There’s never been a better time to start streaming on Twitch. In this easy-to-follow guide, we’ll walk you through the steps on how to quickly setup your first livestream, so you can start building a following and growing your community.
The best part about streaming is that once you get past this initial set up process, you’re pretty much locked and loaded to start streaming on Twitch anytime you want, without having to worry about continuously settings things up.
The tricky part though – and likely the reason you’re on this page in the first place – is knowing what to use and how to use it in order to boot up your stream.
So that’s what we’re going to help you out with today. If the idea of getting your first viewer watching your stream excites you, then lets see if we can get you on the right track!
GETTING STARTED
Creating Your Twitch Account
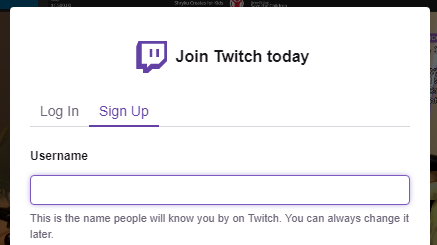
Let’s start with the basics. You’re going to want to start off by making a Twitch account in order to get your channel started, and to get access to your stream key (which we’ll be using in a second).
Once you’ve created your account, we’ll need to decide on which software we want to use in order to setup what your stream is actually going to look like once you go live.
What Streaming Software Should You Use?
To stream, you’ll need a program to broadcast your content to Twitch, and the world.
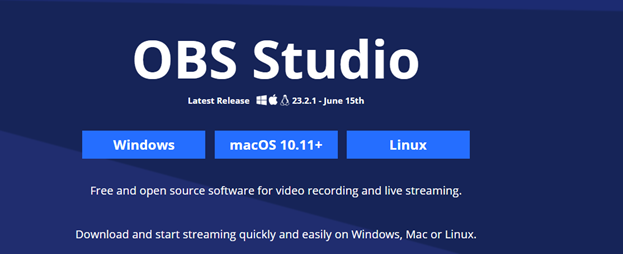
OBS Studio and Streamlabs OBS are two of the most popular software used in the streaming world. OBS Studio is typically known as the best and most adaptable software, so we’ll use that.
However, Streamlabs has a bunch of unique features that might suit your stream. It’s worth checking out both software and figuring out what you like. Luckily, they’re both pretty similar in terms of where all the settings are located so if you get the hang of one, you’ll quickly know how to work the other!
Linking Your Twitch Account to OBS Studio
1. Start off by downloading OBS Studio and installing it. Run the program as administrator if you’re using a windows operating system.
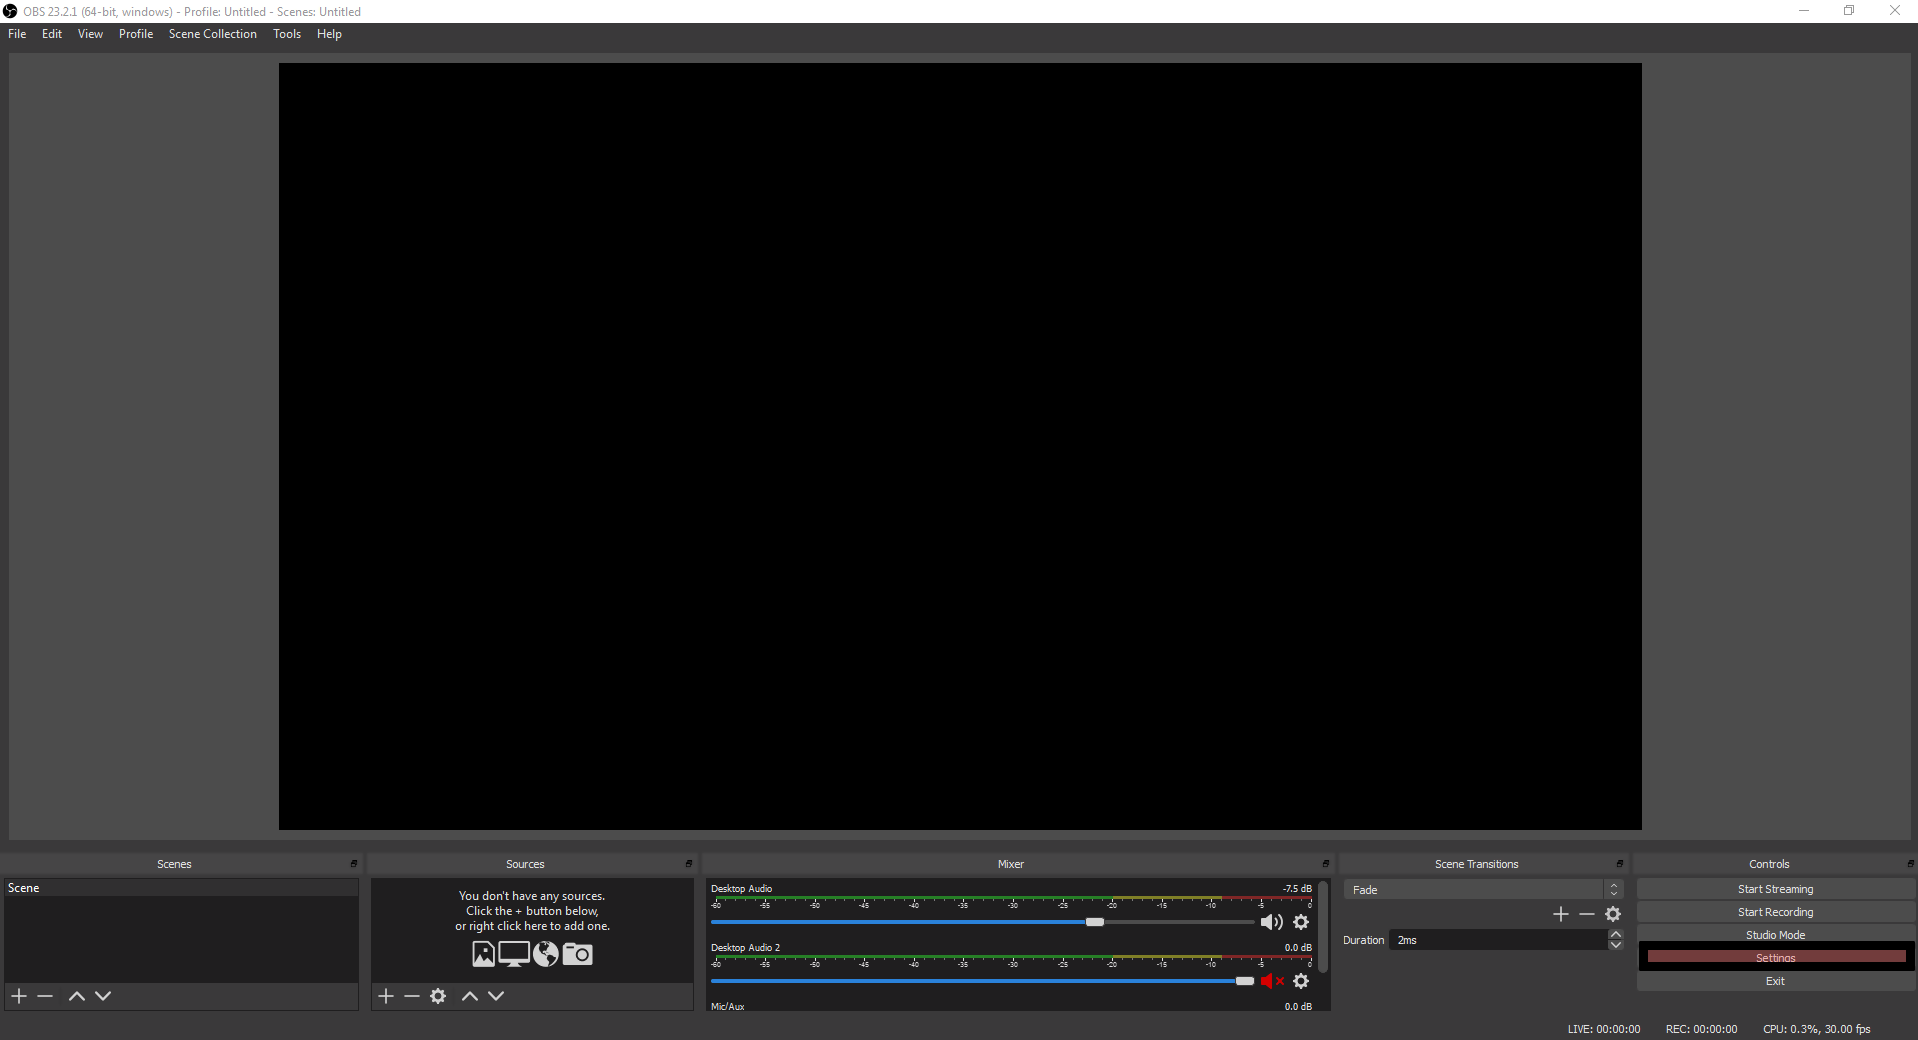
2. When you open the program, it should look like the image below. In the bottom right of the programs, where it’s highlighted in red, you’ll see the “Settings” tab. You’ll want to open that.
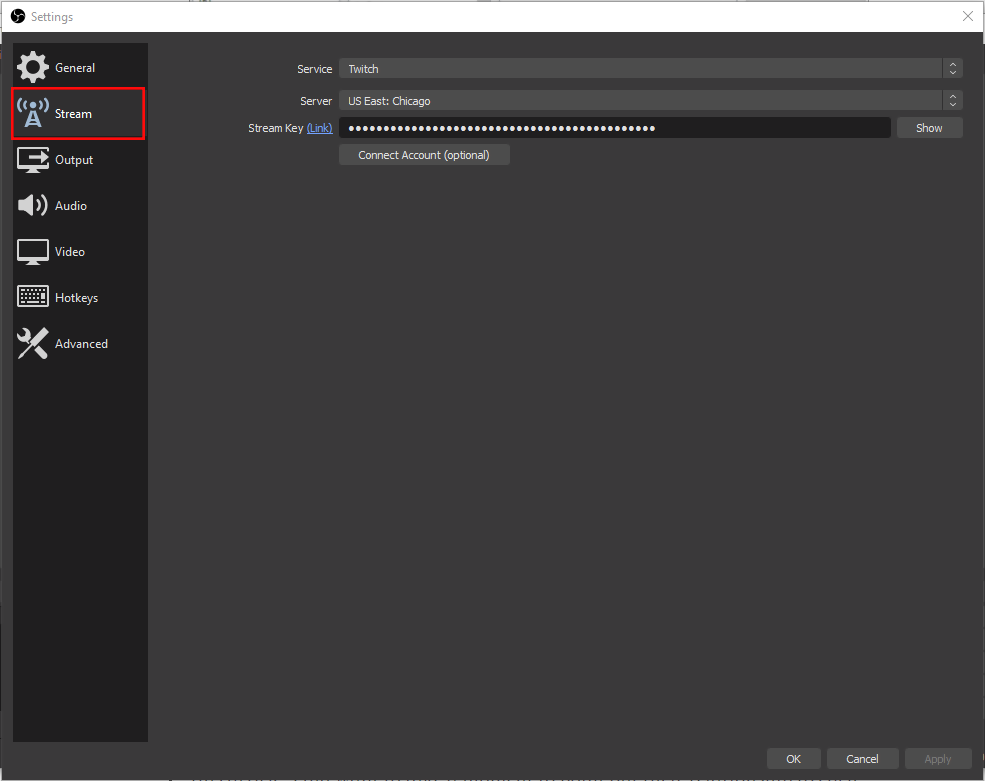
3. We’ll start off by heading over to the “Stream” tab in the settings. Select “Twitch” for your service, and whatever location you’re in for your server.
4. Now, head to Twitch.tv and make sure you’re logged in. In the top right corner of the site you’ll see your profile icon. Clicking on that will get you to this drop down menu below. You’ll want to click on the Creator Dashboard here.
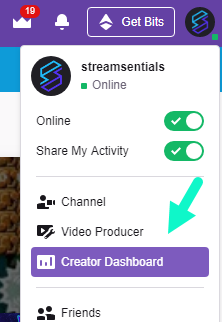
5. On the left-hand side, you’ll see a list of options you’ll be able to click on. Towards the bottom under the settings section is your Channel tab. Navigate there in order to find your Twitch stream key. You’ll need to enable two-factor authentication before getting your stream key, so make sure to do that first.
6. Copy the stream key from your Channel page and paste it in the Stream Key section back over in your OBS Studio program. (refer back to the stream tab screenshot above)
This is the most bare-bones way of streaming. Technically, you could hit the “start streaming” button and go live to your channel. But no one will be able to see anything until you set up what parts of your desktop go live.
SETTING UP YOUR SCENE
Now that you have your key and stream ready to go, let’s talk about what we want to stream. Do you want just your gameplay? How about your entire desktop? What about your a webcam?
We’ll talk about sources and scenes below to tell you some of the things you can stream. Remember there are a lot of options and we’re just touching on the essentials so we can get your stream up and running asap.
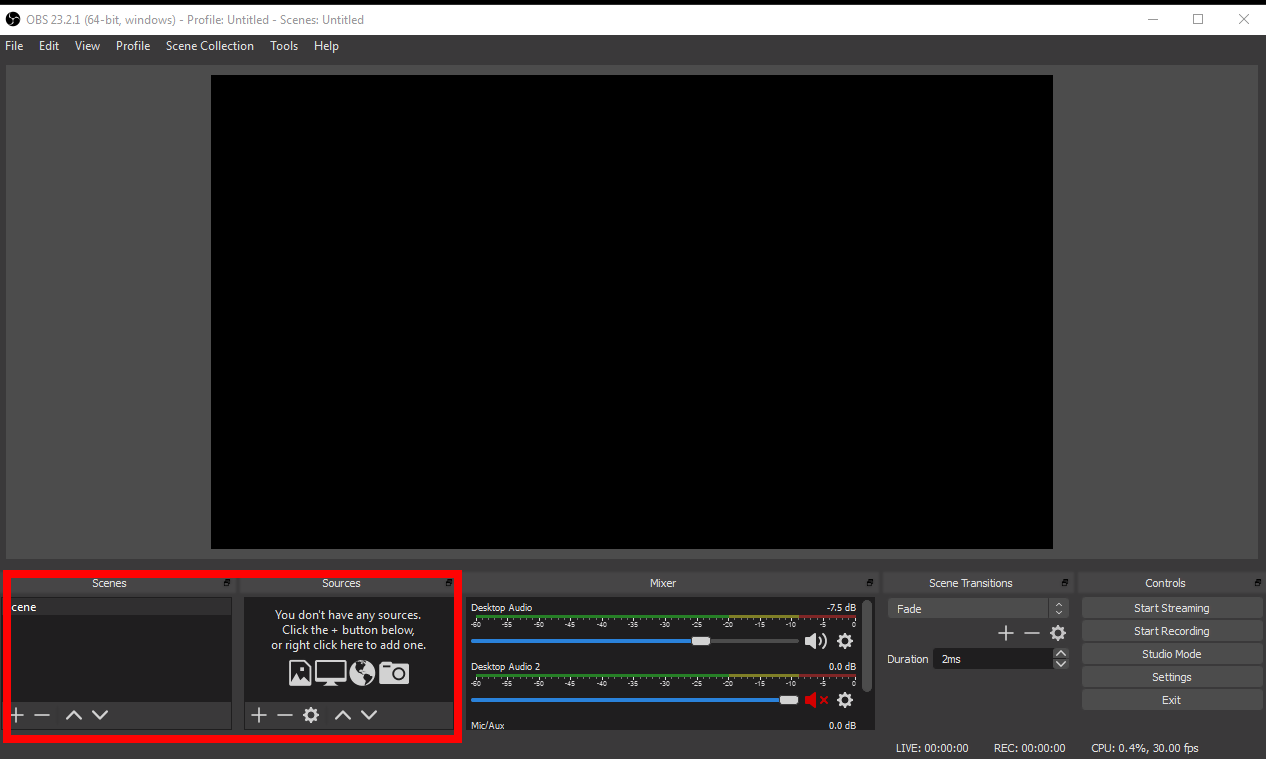
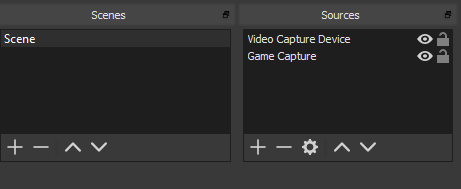
1. In OBS Studio, on the bottom left you’ll see two sections known as Scenes and Sources. They are the bread and butter of OBS where you add your games, overlays, webcams and any other sort of media or device you wish to implement into your stream.
The “Scene” that you create is there to help you organize your layouts and distinguishes what you’re streaming.
For example, if you plan on streaming PC games as well as games on your PS4 or Xbox One, then you’d want to create different scenes. One scene for your PC gameplay, and the other scenes to connect your streaming capture card to so you can organize your console gameplay.
Under the scenes box you have different buttons you can click on. The + icon allows you to add a scene, the – let’s you delete a scene, and the up and down arrows allow you to navigate through multiple scenes. For now, click on the + button and create your first scene.
2. Once you’ve created your scene, your source box directly to the right of your scene box should be empty. The icons at the bottom of the source box work similarly to the scenes. Clicking on the + icon will give you this drop down tab, allowing you to add whatever you want to capture.
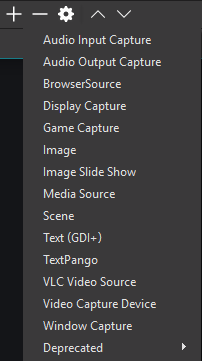
Whether it’s a game, a webcam, or perhaps even some text that you want to show on your screen, OBS has all the types of source options for you to choose from. The capture that sounds the closest to what you need (video capture for your webcam, image for a picture) is usually the right one!
3. Assuming you want to add a game, click on the Game Capture option from the drop down. Then, name your game and click the OK button. Once you do that this little window will show up. You’ll want to click on the “Capture specific window” option. When you do that, a tab called “window” will appear, that’ll allow you to view and select from several programs that are running on your computer.
Make sure the game you wish to stream is currently running so that it’s listed as an option to capture in OBS! A common problem with setting up a game capture is forgetting to run the game to find the capture source.
Source Interaction
Speaking of layers, let’s talk a little bit on how sources interact with each other and how they appear on your preview screen. If you’ve ever used Photoshop or another picture editing tool, sources in OBS works very much like the layer system.
Whatever source you have above the one below it will appear on top of it. Typically, you want to have your game source or whatever other full screen application at the very bottom. That way, when you add other sources such as your webcam or an overlay, they’ll appear over the game that you care capturing.
Check out the example image below:
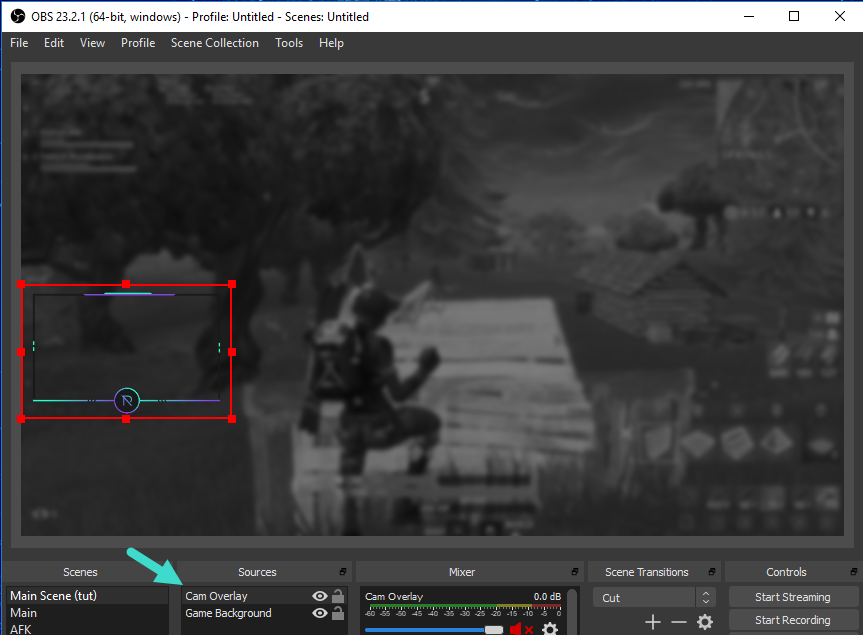
You can see that the cam overlay source is above the game background, resulting in the cam overlay showing up properly. If the cam overlay source was below the game background, then we wouldn’t be able to see the overlay.
Once all your sources are added to your scene they’ll appear on your main preview screen. When you click on each different source you’ll see a red border around it allowing you to crop or freely transform the size and shape to fit to your stream perfectly.
OPTIMAL STREAM SETTINGS
Now that we have all our scenes and sources added, let’s look at the optimal settings you can use depending on the power of your streaming PC.
An important factor to consider here is that streaming does require a fast and stable internet service provider.
You’re going to want a service plan that offers at the very least 6-10mbps upload speed. Luckily, this is a relatively common baseline and is offered with most internet packages.
1. Heading back into the settings of OBS Studio, you’ll want to click on the Output tab. Here, we will select our encoder, bitrate, and CPU preset. At the very top of the tab make sure that the “Output Mode” is set to advanced so you can see all the options.
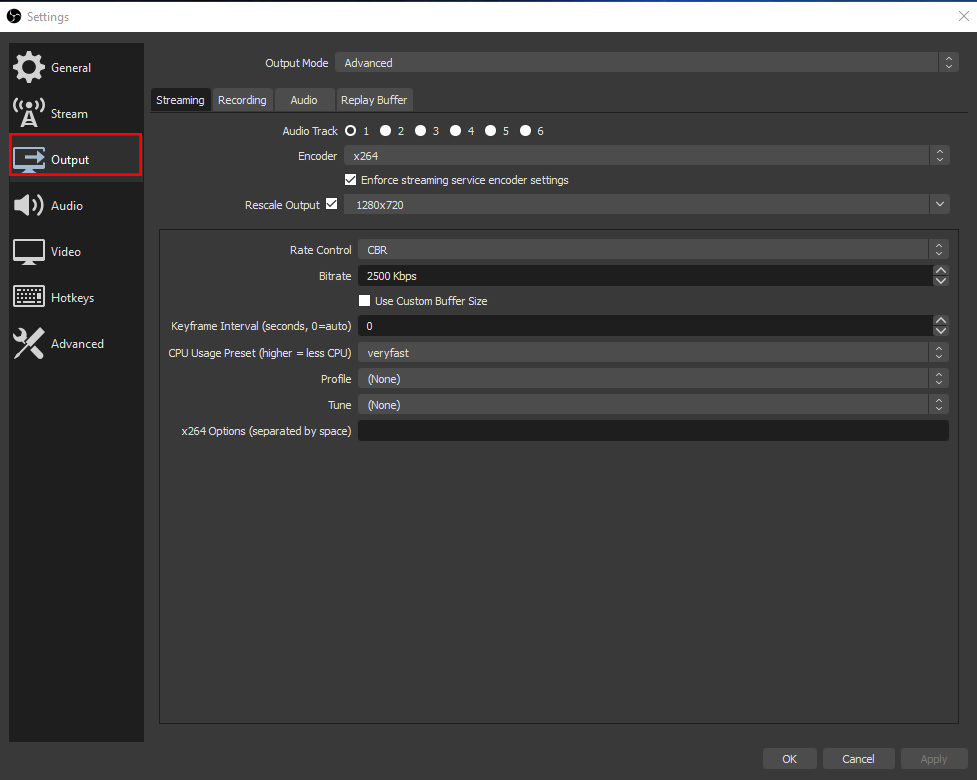
2. By default, your encoder will most likely be the x264 option. If you own an NVIDIA GTX 1060 or higher graphics card, you should also have another option for your encoder known as NVIDIA NVENC H.264.
Here you’re going to want to look at your specifications and determine what would be the better option. On average, if you own a relatively high-level processor, such as an i7-6700k +, then you are fine to leave the encoder with the x264.
Otherwise, it is likely best to use the NVIDIA encoder for better stream performance and fewer FPS drops during gaming.
For maximum streaming performance, check out our selection of the best streaming PCs here.
3. Next is your bitrate. Assuming you have a solid 5-10mpbs upload speed, you’ll want to set your bitrate anywhere between 3500-6000 kbps, respectively.
4. If you ended up selecting the x264 encoder, you’ll have the option to select a CPU usage preset. You can leave it on very fast.
5. Transitioning over to the video tab, the most common and best performance settings for your average PC are shown below.
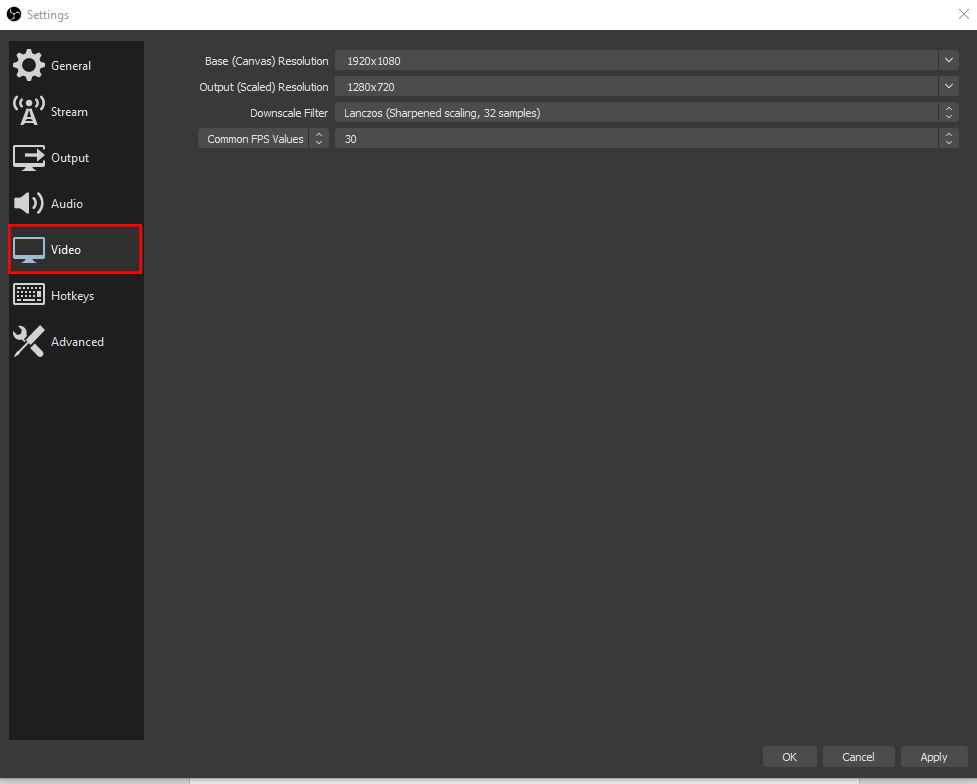
You’ll want a 1920×1080 Base canvas Resolution, followed by a 1280×720 Output (scaled) resolution, a Lanczos 32 sample downscale filter, and a common fps value of 30.
6. Moving onto the audio settings in the audio tab, you will simply set your devices and streaming microphone to the default ones that you use.
For your “desktop audio” set it to whichever device you use to receive your sound. (be it your speakers or your headset). Your mic will be selected in the Mic/Auxiliary section. Leave your sample rate at 44.1khz and your channel in stereo.
For more control over your audio sources, check out how to split your audio in OBS here.
At this point you can start up your stream and test how all your settings work out for you.
If you’re wanting to do that, simply click on the Start Streaming button in your OBS Studio and within a few seconds you’ll be live on your Twitch channel. Do it – don’t be shy 🙂
Your Live Dashboard
Once you’re live, head over to your Creator Dashboard on Twitch so you can do a bunch of streamer control stuff like:
- Viewing your chat
- Editing your stream title, category, and tags
- Managing your Twitch channel images
- Seeing how many viewers you currently have
- Checking the streams health (like potential connection issues)
ADVANCED STREAMING OPTIONS
Overlays
Overlays are usually one of the first major customizations streamers add to their stream when starting their channel.
They’re easy to setup, and help add a professional look to your stream, letting your viewers know that you’re taking your channel seriously.
If you’re using a webcam for your stream, then definitely consider getting a webcam overlay. You can find a bunch of professionally designed webcam overlays here.
Once you get an overlay, it’s as simple as adding a new “Image” source to your OBS Scene to get it setup. We have a more detailed guide on how to add your overlay to OBS here.
Alerts
Alerts are an amazing way to recognize and show your appreciation for your viewers interaction towards your stream.
Whenever you get a new Twitch follower, donation, subscriber, etc. you can set it up so that an alert graphic will popup on your stream displaying the event.
There are a bunch of different alert apps out there for you to choose from, with Streamlabs being one of them, so we’ll stick with them for familiarity sake.
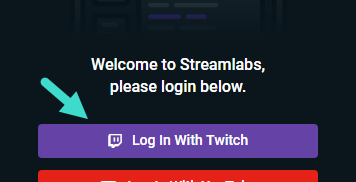
1. Once you’re in your Streamlabs dashboard, on the left-hand side you will see a series of different options to choose from. You will want to click on Alert Box directly under the features section,
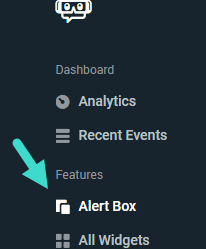
3. Near the top of the Alert Box page you’ll see what’s called a widget URL, click on copy.

4. Going back to OBS Studio, add another source and select “Browser”
5. Once you do that, this properties page should pop up. Paste the widget URL into the URL section. You can also play around with the width and height to best fit your overlays and whatever else you have in your preview. Once you hit okay, you’ll have your alerts set up on and ready to go!
For a more detailed guide on setting up your Streamlabs alerts click here.
Chat Bots
An awesome feature that Twitch has to offer is chat bots. They’re third-party programs that can do a bunch of things like moderate your chat, greet viewers, post automated messages and more.
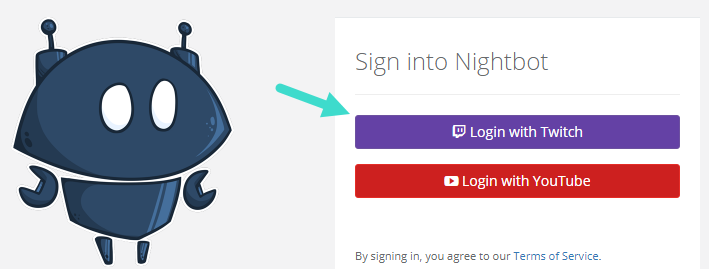
A popular example that a lot of streamers use is Nightbot. It’s a free chat bot that most steamers use due to its intuitive user dashboard and features. It can filter spam, run competitions, perform countdowns, etc.
You can also use Streamlabs’ chat bot called Cloudbot. If you’re already using Streamlabs for your alerts, then it might be more convenient to stick with them.
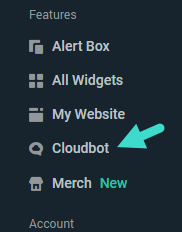
Search for Cloudbot on the left-hand side in the Streamlabs dashboard and you’ll find all the settings to play around with in there.
Setting up Nighbot is equally as easy. It involves linking your Twitch account (like you did with Streamlabs) to Nightbot.
Then from there here are the quick steps to get it running on your channel:
- Once you’re logged in, on the right-hand side of the site there will be a “Join Channel” button that you’ll want to click on.
- After adding Nightbot to your channel, the last thing you’ll want to do is to mod it on your stream by typing “/mod nightbot” in your chat channel. This will let Nightbot function properly.
From there you can simply play around with the settings and commands in the Nightbot dashboard.
Time to Start Streaming!
And you’re all set!
As a new streamer there’s a ton of stuff to figure out – it’s best to tackle everything one step at a time so you don’t get overwhelmed with everything.
Don’t worry about making everything perfect.
You now know how to stream on Twitch, so start off by doing just that …go stream!
Then from there you’ll quickly figure out what settings you need to adjust, or other features you want to add to your stream.
You’ve got a long journey ahead of you entering into the streaming world. But hey – it’ll be fun.
And who knows, maybe one day you’ll be big enough to be verified on Twitch.
Enjoy 🙂