In this guide I’m going to be showing you how to add your overlay to OBS Studio.
OBS can be a little tricky to work with if you’re not completely familiar with it yet, but once you’ve gone through this quick tutorial on adding an overlay to OBS you’ll have mastered one of the most important steps in managing your Twitch stream.
It’s a fairly straightforward process, so open up your OBS and let’s get right into it.
If you’re more of a visual learner, then I’ve put together a video guide for adding your overlay to OBS that you can watch below:
I’ll assume you already have Open Broadcast Software Studio set up, but if you don’t you can grab it here.
1. Select the Scene You’re Wanting to Add Your Overlay to In OBS
If you have multiple scenes setup for your stream in OBS, then before anything you’ll want to make sure you have the scene you’re wanting to add your overlay to selected.
Just left click on the scene, then verify that you’re on the correct scene by checking to see if that one has the blue background behind it.
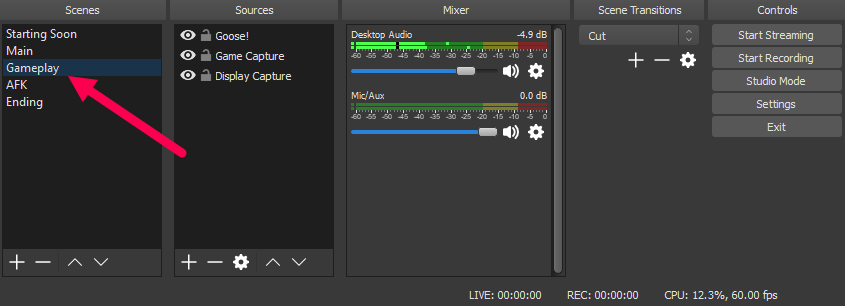
Or if you want to create a new scene, you can right-click in the Scenes box and click Add – or click the plus (+) icon on the bottom left and click Add.
2. Add Your Overlay to OBS
Once you have your scene selected, you can now add your stream overlay to OBS under the Sources tab.
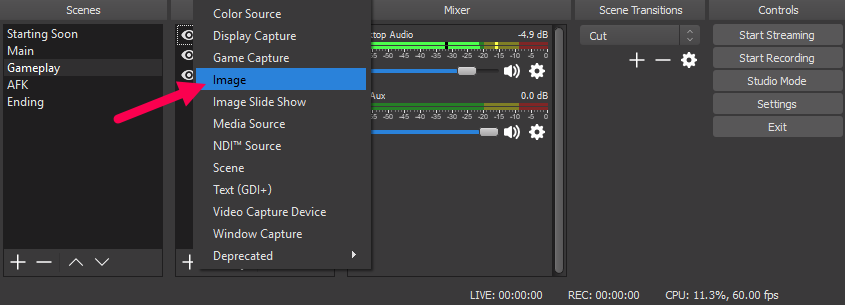
To do this, simply right-click anywhere within the blank space of the Sources box, then mouse-over the Add button, then left-click on the Image button that pops up.
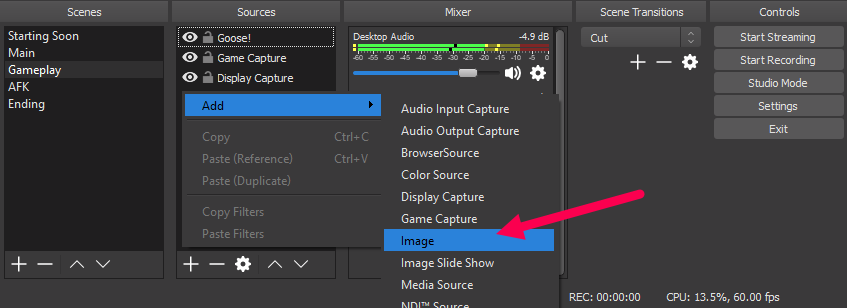
Alternatively you can left-click on the plus icon (+) at the bottom of the Sources tab, then left-click Image in the window that pops up.
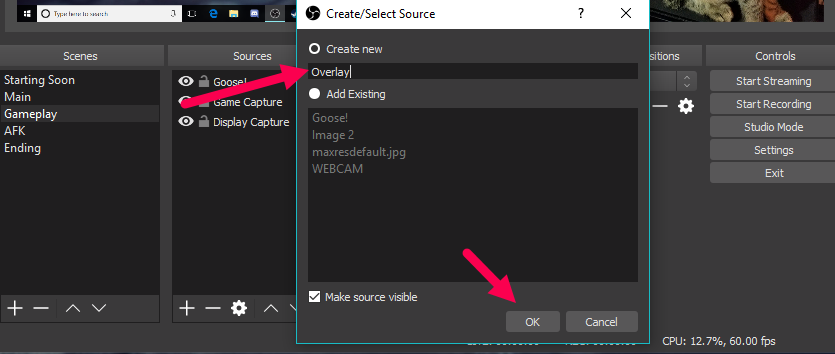
3. Name Your Overlay
A window will popup in OBS with the options to Create new, or Add Existing. Since this is your first time adding an overlay to OBS you’ll want to select the Create new option.
In this window you also have the option to name your stream overlay. So make sure to name it something that’ll allow you to easily identify it in your Sources tab. Something like, “overlay” is a good start ;).
Once you’ve done that, hit OK.
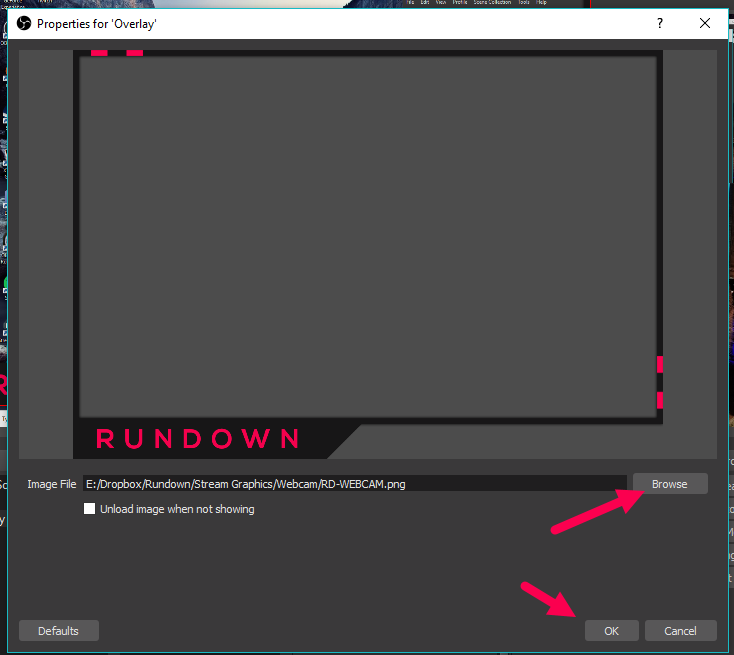
4. Upload Your Stream Overlay to OBS
On the next screen you’ll have the option to Browse for your overlay image file. So click on the Browse button, then select your overlay wherever you have it saved on your computer.
For this example I’ve chosen to add my webcam overlay to OBS.
*If you’re due for a new webcam overlay for your stream, then check these out.
Once you’ve found your overlay, and have it showing in your window like the screenshot below, then hit OK.
>> Click here for the best OBS settings for your stream.
5. Resize and Move Your Overlay
When you first add your overlay to OBS you’ll probably notice that the image is too big and/or not positioned where you’d like it.
To resize and change the positioning of your overlay you can right-click on the actual overlay in your preview window, or on the file in your Sources tab…
And in the options menu that pops up when you right-clicked; mouseover the Transform option and there you’ll find a bunch of options to modify your overlay.
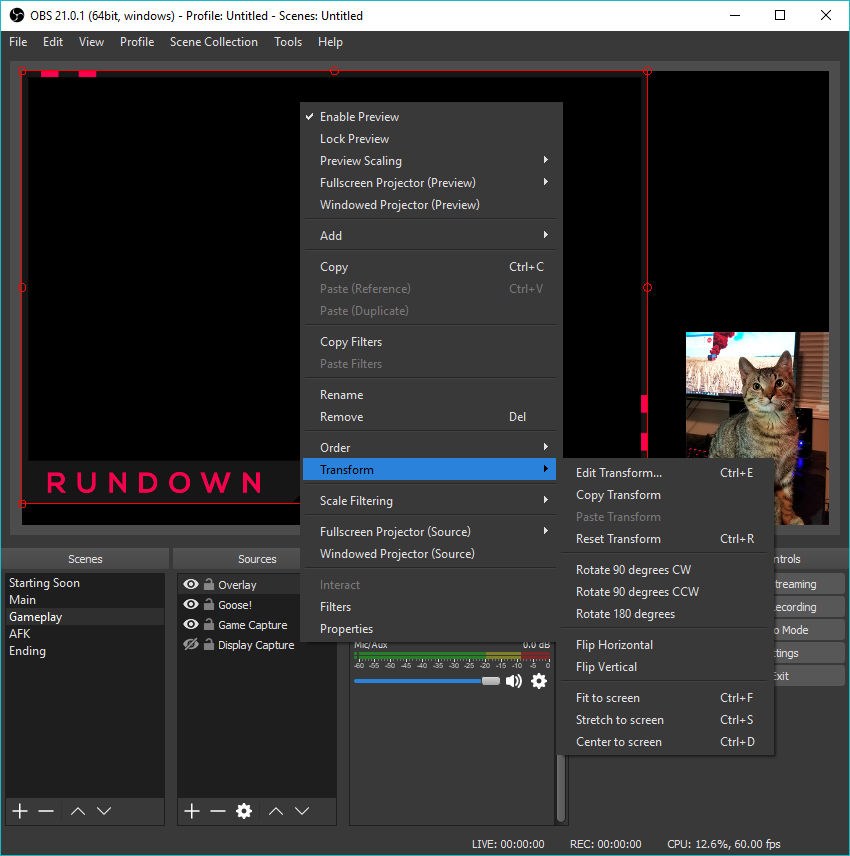
If you’re simply wanting to resize and move your overlay around, then here’s a quick way to do that:
- > To move your overlay left-click and drag on the image in the preview window.
- > To resize your overlay left-click and drag on any of the small red circles that are around your image.
You also have a couple other left-click options when resizing your overlay:
- > If you hold alt and left-click while dragging your overlay you’ll be able to crop the image.
- > If you hold shift and left-click you’ll be able to resize your overlay without the aspect ratio being locked.
Once you’ve resized and positioned your overlay how you want it to look on your stream, then you’re all done! You’ve just learned how to add your Twitch overlay to OBS.
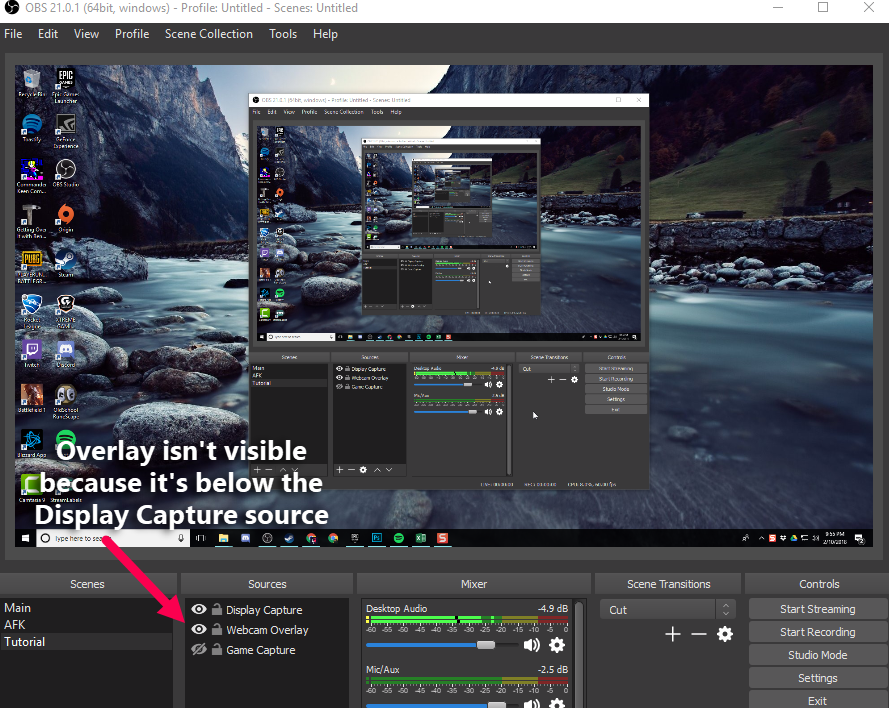
Overlay Not Showing Up In OBS?
If your overlay isn’t showing up in the OBS preview window when you added it, then it could be because your Image Source is below your Game Capture or Display Capture Source.
Think of each source as layers; the sources that are higher up on the list will show up over top of the sources that are below them.
So if you have a source that is taking up your full screen (like your display or game capture), then make sure every source that you want visible (like your overlay) is listed on top of those full screen sources.
You’re Done!
That’s how to add an overlay to OBS Studio. Now that you know how to set up your overlay, you now know how to add other images that you might want to add to your stream as well. It’s the exact same process :).
If you have any questions about adding your overlay to OBS please leave a comment below, and I’ll see if I can help out.


I have done everything in every video I have seen, I have downloaded the stream overlays and installed all the necessary fonts required but still obs does not show the stream overlay folder that I am using like it isn’t downloaded. However when I browse files outside of obs it shows its downloaded and opens the image when clicked on.
Weird. What file type are the overlays? And what directory is your folder in?
Hey I was wondering, what would cause a Overlay on Streamlabs to not move over to OBS when I used the Export/Import feature on OBS when all the other overlays have been imported correctly.
Hey Ana, wish I could help but I’ve never used that featured before. Either of their support channels should be able to get everything figured out for you though!
Hi, i have created an overlay in my browser with elements, that includes media share, chat and text, but how do i get this in my obs stream? I copy the link, and paced it, into a browser source thing, but there isnt anything showing up 🙁
Hey Tey, what are you using to host all those elements in your browser?
I can only copy the URL of my Overlay
You can use the Browser source option then, if I understand what you mean correctly 🙂
Hey! I was just wondering if I set up the overlay i want to know if i start streaming on twitch from PlayStation 4 without any 3rd party recording service such as OBS will the overlay show on stream even if im not using OBS to stream from there
Hey man, no unfortunately you can’t work with custom overlays if streaming directly through your console. Capture card + OBS is the way 🙂
So I have my overlays all set up, but how to I get, for instance, the “most recent follow” to actually show my most recent follower? In streamlabs there was a list (most donated, most recent follower, subscriber, ect) but I don’t see that option in OBS, when I get a new follower, it doesn’t update.
Hey, this guide will help you out 🙂 https://streamlabs.com/content-hub/post/setting-up-stream-labels
It’s got info if you’re using SLOBS, or OBS Studio.
So I am experiencing a weird cam/game capture problem. I add the game capture – no issues. Then I add webcam as another video capture device. When I do, The game audio (Desktop Audio) disappears. If I try to add the webcam and resize it before adding the Game capture (video capture device), then no matter what settings I try, there is just no sound in desktop audio at all. I just don’t get it. Please help?
How would you add an overlay that’s connected to a link on lightstream, that’s not an image ?
Once you have created a Scene, right click in the Sources box (or use the plus at the bottom) to add what ever you want to capture. Whether it’s a specific window, a capture card or game, image, text or your entire display that you want to capture, there are several different sources available in OBS Studio for you to choose from. Try them out!
I can either see the game but not the overlay or the overlay but not the game?
Is the overlay source above your game source? And is your overlay a transparent image?
I have a problem. I set up my overlay, but my game didnt show on streams. or my league client. it appears only the overlay. what can i do?
Can I add an overlay retrospectively?
Also, is it possible to edit a recording in OBS once it’s finished? I want to cut bits out, that I are not good.
How do I create an offline starting now and interval screen overlays?
I am streaming on Facebook live. Where is the best place to get an overlay for Facebook love streams?
were could I find the overlays for obs?
Hey David, there’s quite a few options for getting overlays for your stream. https://streamplaygraphics.com/ is usually what I recommend.
Is it possible to use OBS studio to add a prerecorded facetime onto another video that is a prerecorded screencast? The facetime would be small in the corner and the screencast in the background. Please explain how I would do this thank you!
I don’t see why not. If both videos are appropriate video file formats, then you can simply add them to your OBS scene – make sure your facetime video is on a layer above the screencast so that it’s visible over top of it.
How can I get the overlay to go on twitch without starting the stream and going live
Hey Bow – not sure what you mean. Are you talking about an offline screen?