You don’t need to be a Twitch affiliate to start accepting donations on Twitch. In fact, many streamers who are just starting out might actually put up donation goals to help them improve the quality of their stream.
You can put up a donation goal for whatever you’d like, whether for stream upgrades or for other things. But if you aren’t quite sure how to set up donations on Twitch, this very detailed guide will help you every step of the way.
Paypal and Bits
Before we begin, there are a couple of ways for you to accept donations on Twitch. The first way is to accept bit donations. Bits are Twitch’s currency which can be purchased with money. Your viewers can donate bits to you and you can later get the money in your Twitch monthly payout (once you reach the $100 threshold).
The disadvantage to bits, however, is that it’s only for Twitch affiliates – and it does cost your viewers more because Twitch takes a cut. Plus, it can take a while for you to receive your money since you have to wait to get to the $100 threshold for the payment.
If you’re wondering how to set up bit donations, you actually don’t need to do anything! Bits and cheering immediately get activated once you are accepted into the Twitch affiliate program. However, you can fiddle with your settings in Twitch if you’d like to make changes such as adding bit badges and setting a minimum donation threshold.
Of course, another way for you to receive donations is by accepting them via PayPal. This option is often favored by many streamers considering it doesn’t cost their viewers more, and the money is instantly received.
How to Accept Donations Through PayPal
If you would like to accept donations through PayPal, setting them up is actually rather easy. You can make use of a number of different platforms, such as Muxy and StreamElements. However, in today’s guide, we will be discussing the most popular platform: Streamlabs.
How to Set Up Donations Through Streamlabs
Streamlabs is incredibly popular among streamers because it offers a ton of benefits on top of the utmost convenience. They’ve really made it easy to get everything set up, whether you use Streamlabs OBS or OBS Studio (or even XSplit!).
Before we can walk you through how to set your donation goal up, you first have to connect your PayPal account to your Streamlabs. You can do this by visiting Streamlabs.com, then logging in via Twitch. Go to settings and you’ll be greeted by your Donation Settings, where you can then connect your PayPal account.
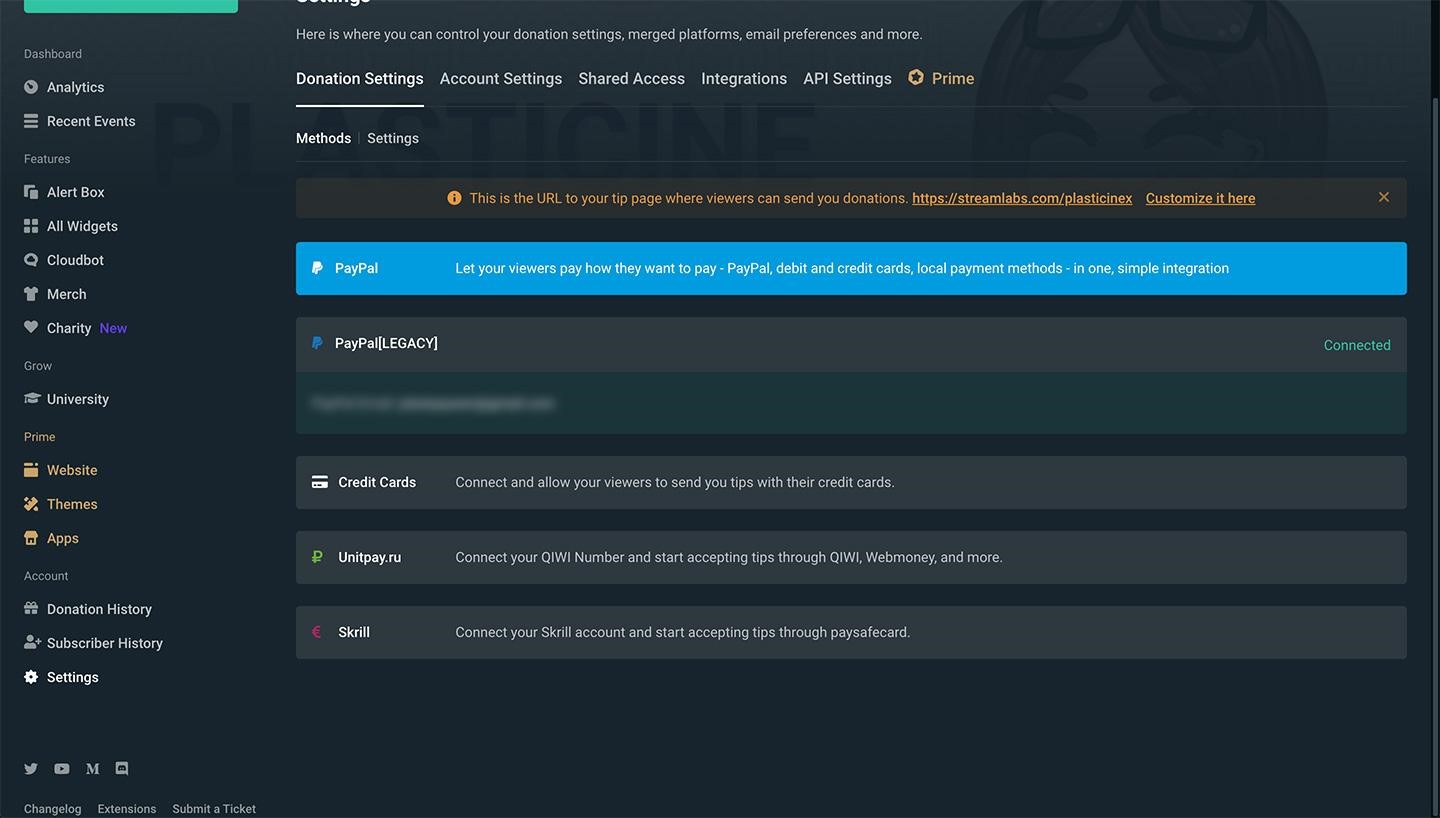
Connect your account and you can finally start setting up your donation goals and making money on Twitch.
Setting Up Your Donation Goal on OBS Studio
If you don’t use Streamlabs OBS, setting your donations up will take an extra step or two. It’s still easy and convenient though, so there’s no need for stress! This step-by-step guide will help you to figure out what you need to do to get your goal up on your stream.
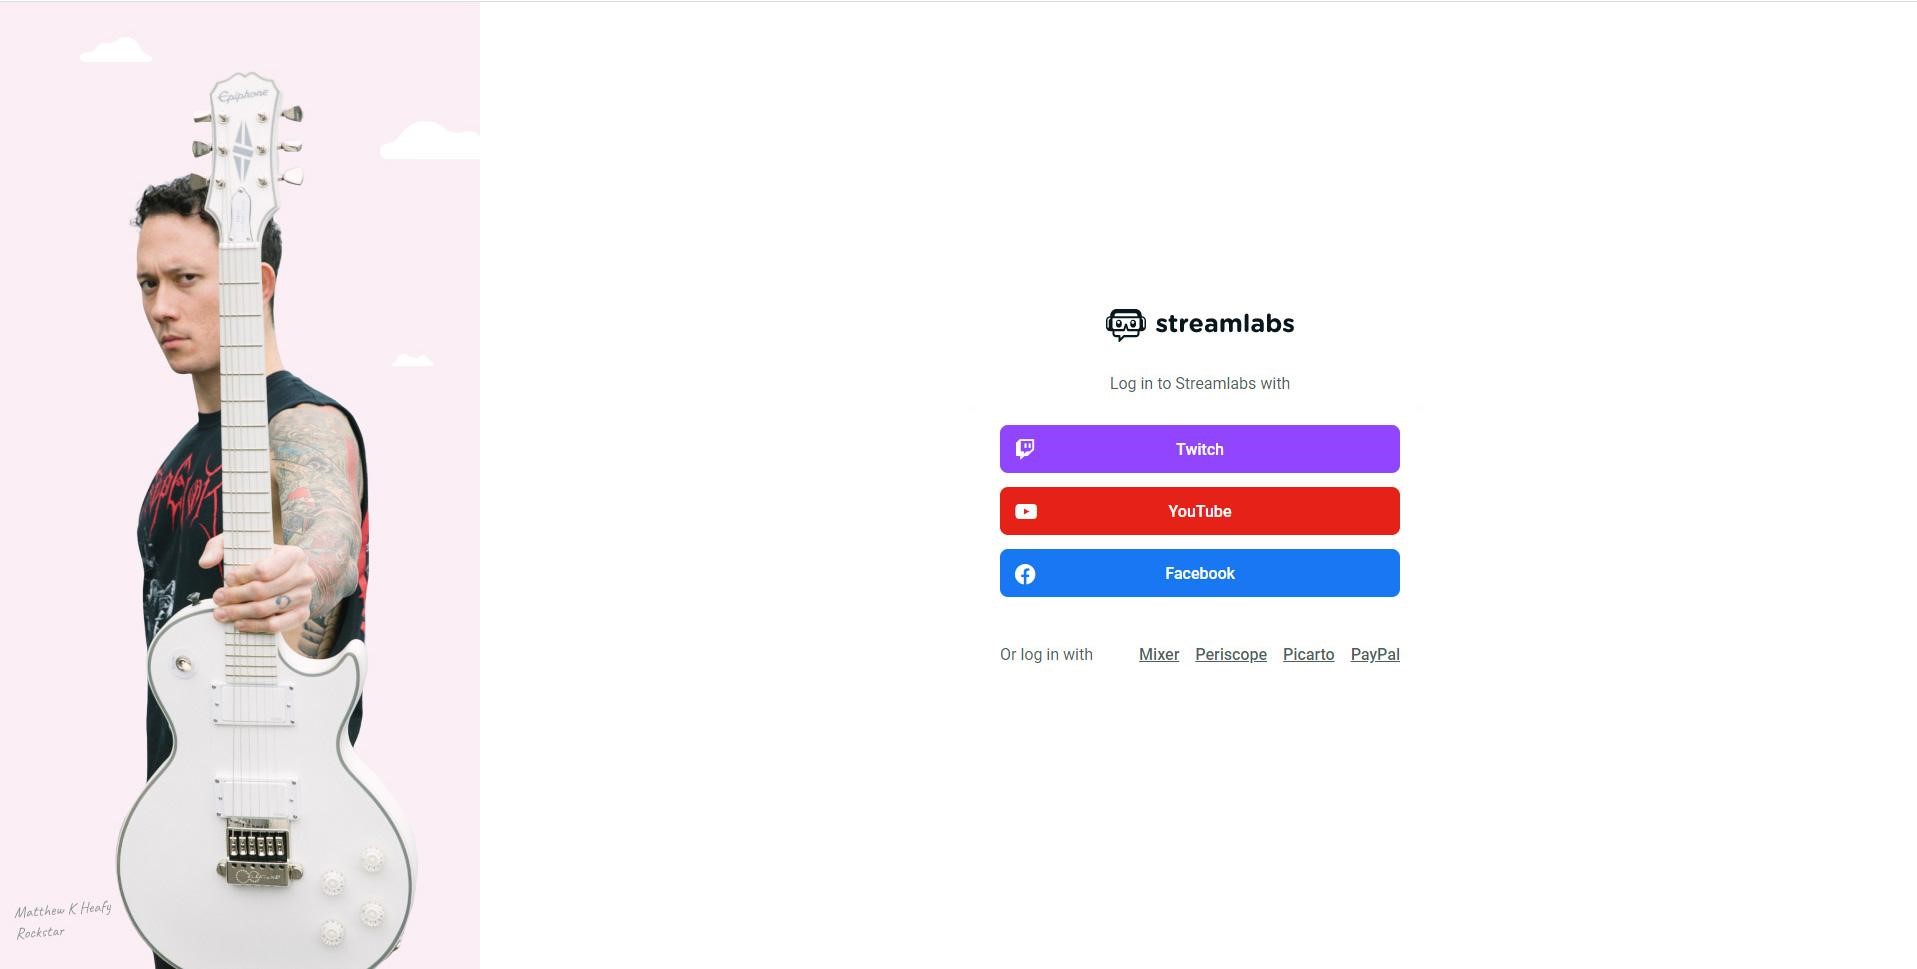
Step 1: Log in to Streamlabs.com
The first thing that you need to do is to log in to Streamlabs. Thankfully, you don’t need to make an account—you already have one! Click on the “Twitch” button, and it will take you right to the next step.
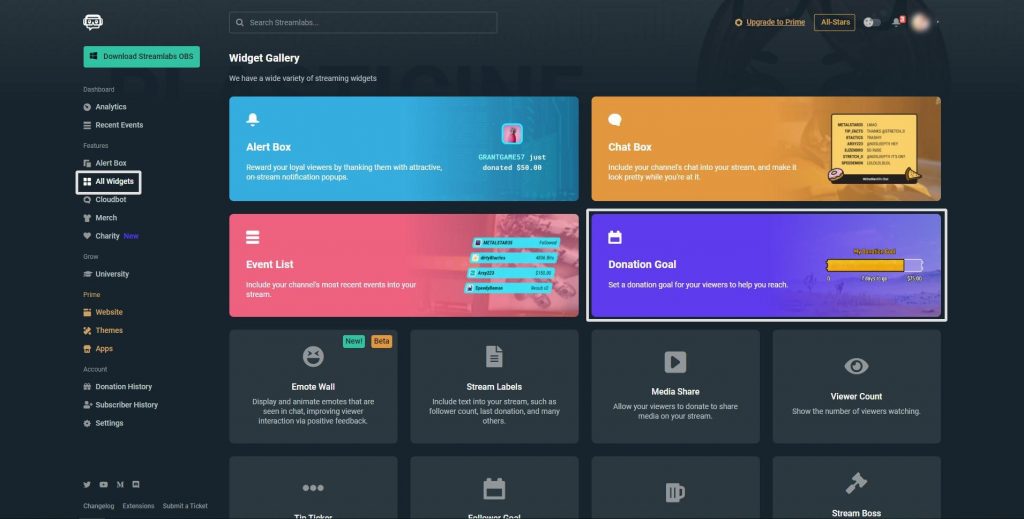
Step 2: Navigate to Your Donation Goal
Once you have logged in to Streamlabs, navigate to your donation goal. You can do this by clicking on “All Widgets” on your left sidebar. Your Widget Gallery will load. On this page, you’ll find your Donation Goal widget. Click on this image, and it will take you to your goal.
Step 3: Set Your Donation Goal
On this page, you can configure your donation goal however you need to. It’s always a good idea to set the title of your goal for whatever the donation goal is for. Trying to upgrade to a better mic? How about a nicer webcam? Want to get enough money to purchase a game you want to stream? Indicate it in the title. Your viewers will want to know what their money is going towards, no matter how “silly” or serious the goal.
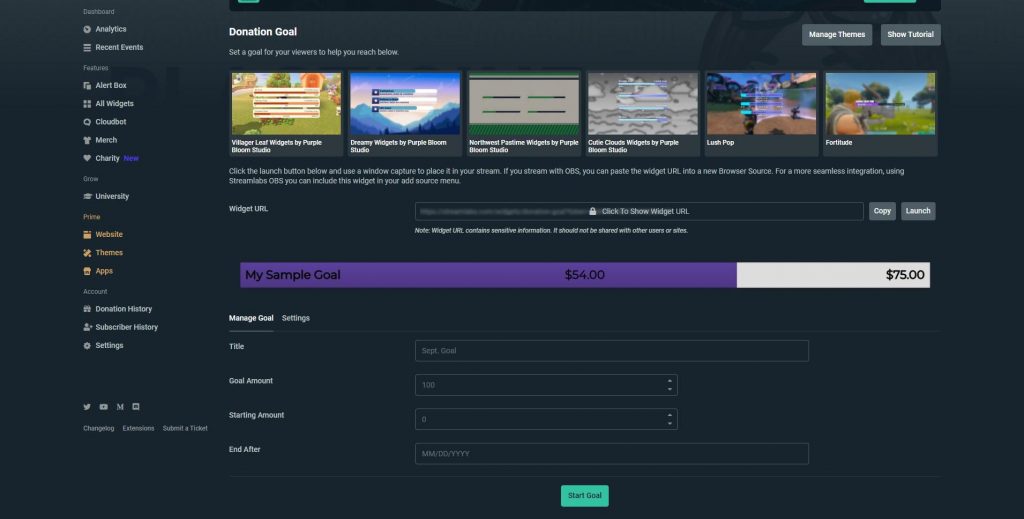
Once you have finished setting your goal, you can simply click “Start Goal” and you’re pretty much good to go. However, if you would like to change the appearance of your donation goal, you’ll then have to click on “Settings”.
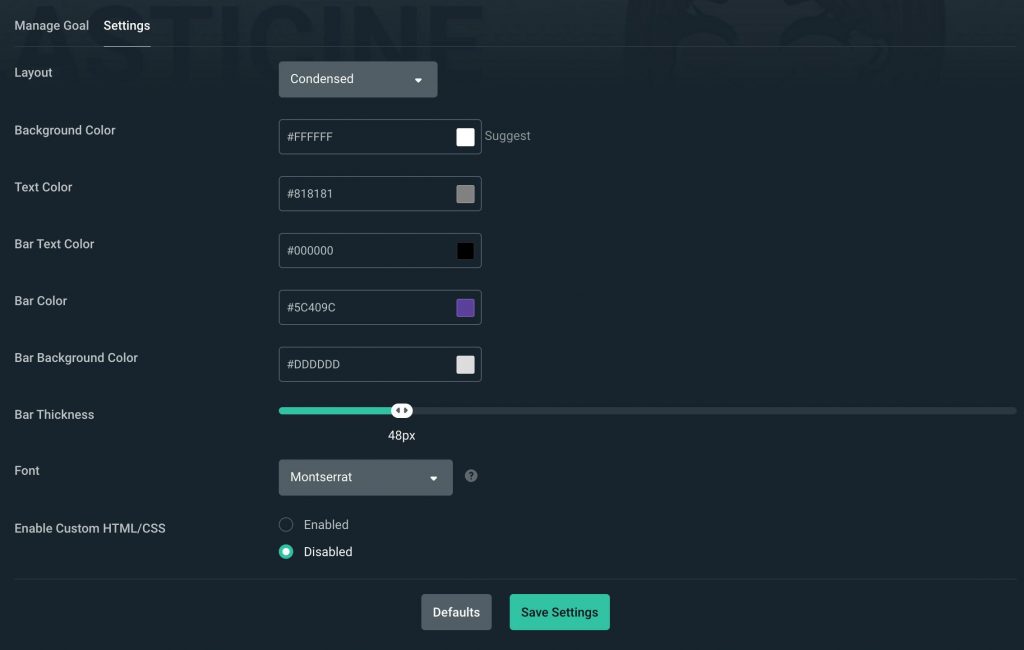
On the settings page, you’ll have a few things that you can fiddle around with. You can change the layout of your goal to suit your tastes. You can also change the bar’s thickness, colors, and fonts at will. A preview of your goal will also be available so you can see changes as you make them. When you are happy, click “Save Settings”.
Step 4: Add a Browser Source via OBS
The final step is to add your goal to OBS. To do this, click on “Copy” next to the widget URL.
![]()
In OBS, add a new browser source. Configure it however you’d like, using the widget URL you’ve just copied.
Congratulations—you’ve set up your first donation goal!
Setting Up Your Donation Goal Using Streamlabs OBS
One of the biggest reasons why Streamlabs is so popular is how simple and convenient it is. It’s incredibly easy to set up your donation goal using Streamlabs OBS. Check out this detailed guide to help you along the way.
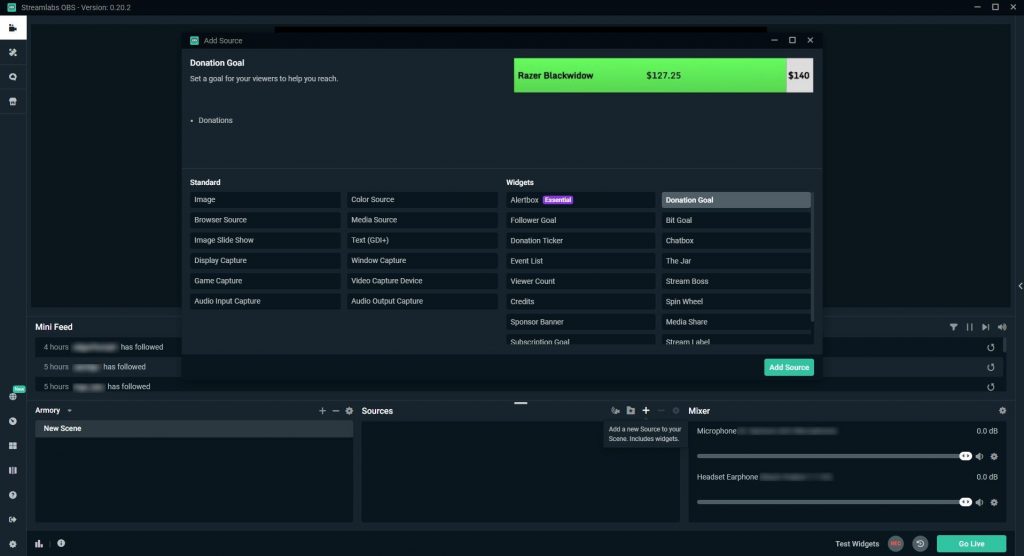
Step 1: Open Streamlabs OBS and Add a New Source
The first thing you will have to do is to open your Streamlabs OBS. Then, add a new source. On the Add Source screen you’ll see the many available options, but simply click on “Donation Goal.”
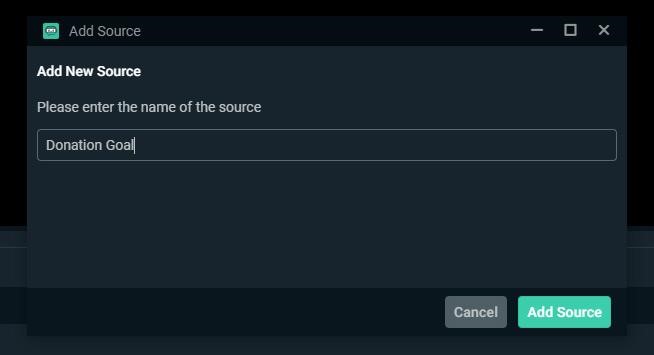
The next thing you’ll need to do is name your new source. If you don’t care to name it, leaving it as “Donation Goal” is fine too.
Step 2: Configure Your New Donation Goal
Upon adding your source, you’ll be taken to the settings. Here, you can set up your goal however you would like. Change the title to whatever your goal is for, add the amounts and the end date.
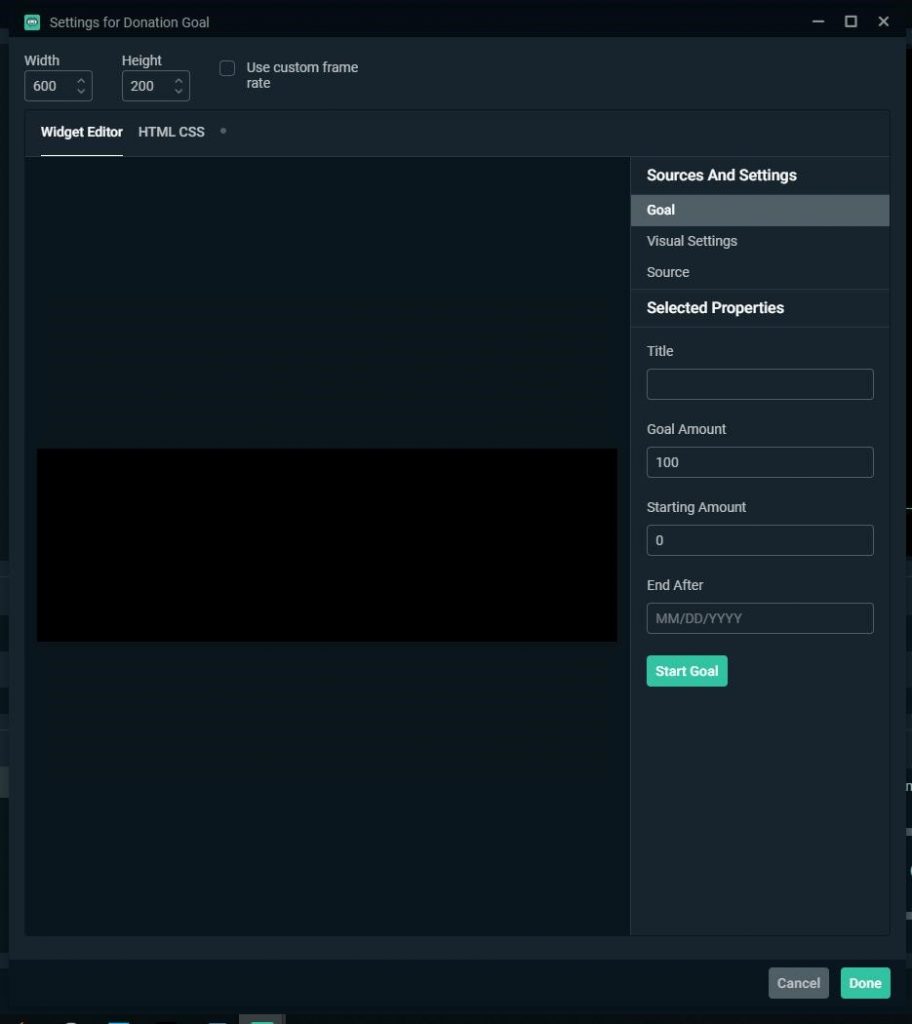
Once that’s done, you can simply click “Start Goal” and you’re good to go. However, if you want to change around a few things with your goal (mostly with its appearance), you can click on “Visual Settings” on the right hand navigation bar.
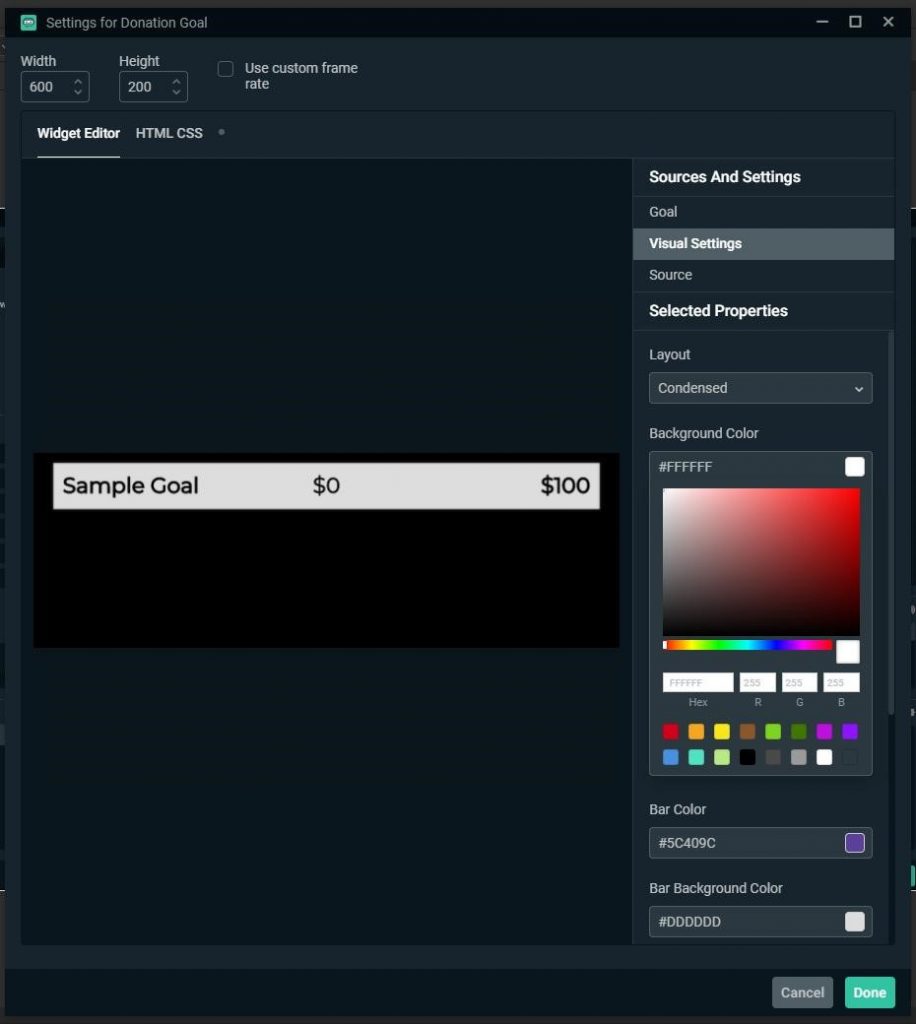
On the Visual Settings page, you’ll be able to see your donation goal bar in real-time as you make any changes. Change the colors, the fonts, and the layout. Feel free to fiddle with the settings until you’re happy with the outcome. Then, click “Done” and you can finally place your donation goal wherever you’d like on your stream overlay.
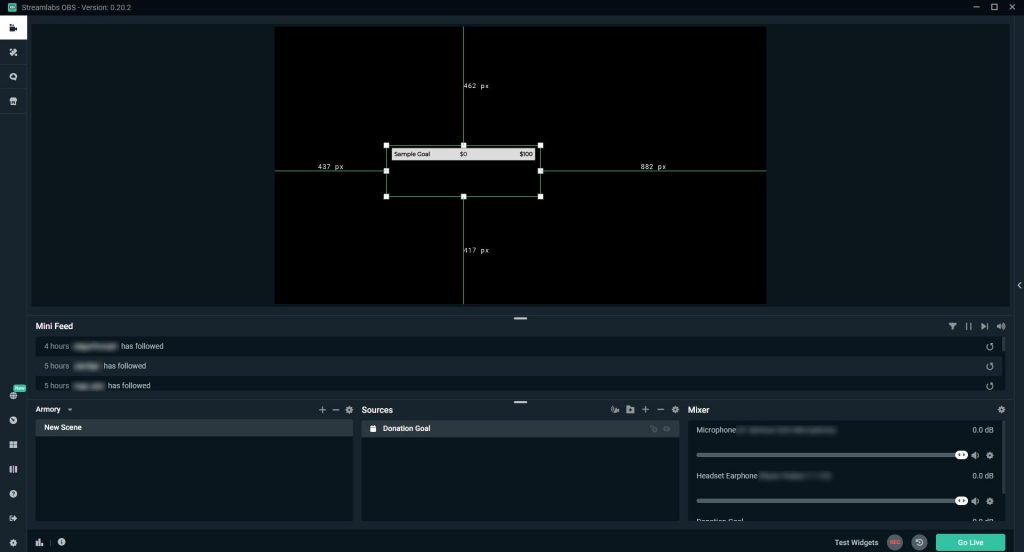
Move your goal wherever you’d like to keep it. A good idea is to put it away from the stream content so that it doesn’t block anything important.
Make It Easier for Your Viewers to Donate
Once your goal is set up and you’ve managed to add it to your stream overlay, your viewers can start donating to you on Twitch by visiting your Streamlabs URL.
Your Streamlabs URL will be: https://streamlabs.com/yourusername
Beyond setting up your donation goal, you should also make it easier for your viewers to donate to you. Here is how you can do just that:
- Add a Donation Panel – New visitors to your channel will most likely take a look at your page and panels to find out more about you. It’s a good idea to have a donation panel there just so they know they can donate if they want to, and how. Here, you can simply link to your Streamlabs URL. You can also include your terms for donations (i.e. “Donations are appreciated! Non-Refundable”). Some streamers may even include a thank you list to previous donators.
- Set Up Commands – To make it easier for your viewers to access your donation link, set up a command through whichever Twitch chat bot you use on your channel. Set it to something like !donate and have the bot respond with your message for your viewer along with your donation link.
Don’t Scare Your Viewers Away
There’s nothing wrong with accepting donations. Viewers and streamers know that donations can help a streamer, big or small, to keep their stream quality up and cover some of the bills.
However, there’s a difference between having a donation goal up and accepting them when freely given and demanding for your viewers to donate to you. The latter will very likely scare viewers away and leave them with a bad impression of you!
Thanks for checking out our guide on setting up donations on your Twitch channel!
If you have any questions, or suggestions on future streamer content you’d like to see, please leave a comment below :).