There are many reasons why a stream delay might be a useful addition to your stream. A stream delay can help you to avoid stream sniping issues and for this reason, is usually required in scrims or tournaments.
You can set how long you want your delay to be – it can be as short as 10 seconds and as long as 5 minutes if you’d like. That way, your live stream only shows events after the specified delay duration has elapsed.
Knowing how to change your stream delay is incredibly easy and can be done straight in your broadcasting software or right through Twitch.
What is a Stream Delay?
You can find a stream delay feature in almost every broadcasting software available.
This feature allows an increase in latency, allowing a certain period of time in between things actually happening and them showing up on stream. It is possible to set the delay to a duration of your choosing.
It is also worth noting that stream delays (latency) will also naturally occur for your stream.
The length of the delay will depend on your internet connection and your machine or device’s specifications, but generally, you can expect a 5-25 second delay. You can increase this delay for whatever purpose.
What are Stream Delays for?
Stream delays can be handy in a number of ways.
- They can help to avoid stream sniping, which is when viewers can try to queue into the same game as you and take advantage of your stream so they can win. Some stream snipers can also do malicious actions that can get you in trouble with Twitch and other streaming platforms and games.
- A small delay (30 seconds for example) will allow you to stop your stream and drop whatever happened during the delay period, preventing it from showing up on your stream. This is incredibly useful in the case that something embarrassing happens or a bannable offense occurs unintentionally.
Unfortunately, stream delays are not always advisable for a number of reasons. Because of this, they are generally only used when it is necessary to prevent stream sniping, such as in tournaments or important gaming events.
You may not want to use a stream delay during normal streams because it can prevent organic and timely interactions with your viewers and chat. The longer the stream delay, the worse it gets for interactions with your chat.
After all, most of their comments will be about things that happened in the past, which makes it difficult for you to interact organically.
Plus, even if you do respond to something they said, it will take a while for your viewer(s) to actually hear what you said. If your viewers are unaware that you are running a stream delay, you might even lose viewers.
Reducing Stream Delay on Twitch
As a viewer, when you look at the Twitch player, you may find an option to turn on “low latency mode”. Using this will help to lessen buffering and delaying if you are having some internet issues.
As a streamer, reducing your stream delay by using low latency mode on Twitch allows your viewers to see your stream with as short a delay as possible.
When doing this, it is good to ask your viewers for their feedback as some viewers run into issues when this mode is activated.
To use low latency, mode, simply login to your Twitch account.
From there, click on your profile picture on the upper right corner.
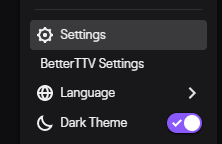
Then, click on the “Settings” link in the corresponding dropdown menu.
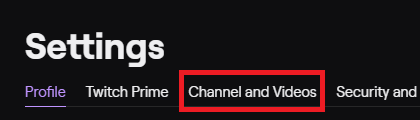
From there, click on the “Channel and Videos” tab.
On the next page, scroll down to the “Low Latency Mode” section.

Click the setting you prefer and don’t forget to save after you are done!
Setting Up Your Stream Delay
If you find yourself needing to set up a stream delay, there are various ways to do it. You can do it in Twitch itself, but only if you are a Twitch Partner. For this reason, this article will discuss adding stream delays through the most common broadcasting software.
OBS Studio
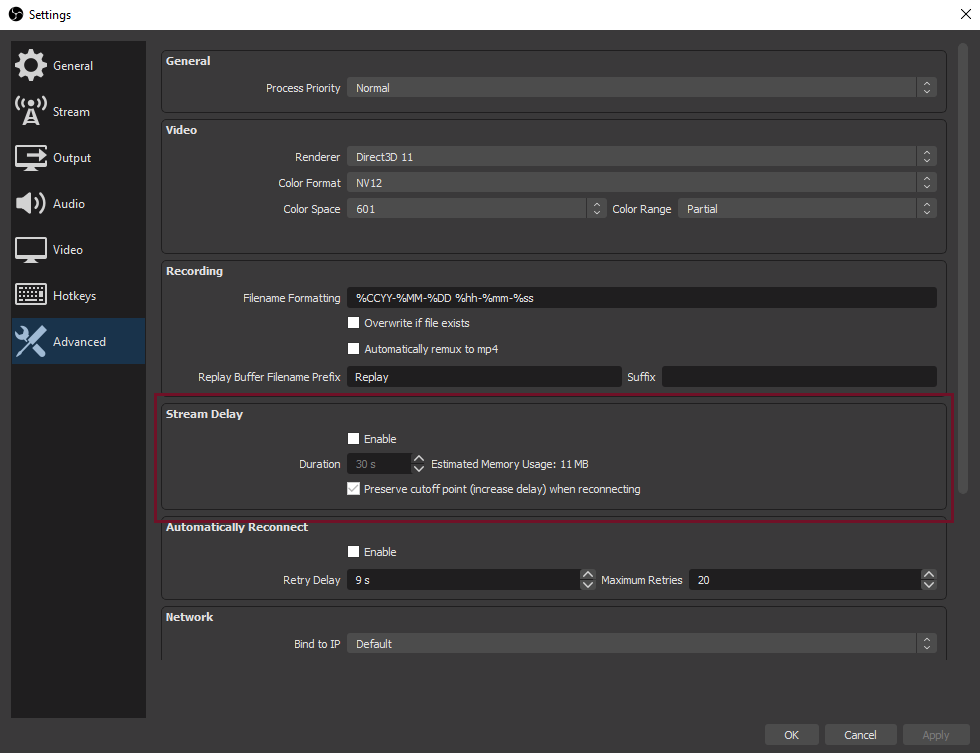
To set up a stream delay on OBS studio, simply open your program and navigate to the Settings/Preferences.
From there, click on “Advanced”. There will be a Stream Delay section – here, you can tick the checkbox to enable the delay for whatever duration you want it to be.
Save your settings and you can start streaming with your new delay right away!
If you would like to turn off your stream delay, simply untick the “Enable Delay” box.
Streamlabs OBS
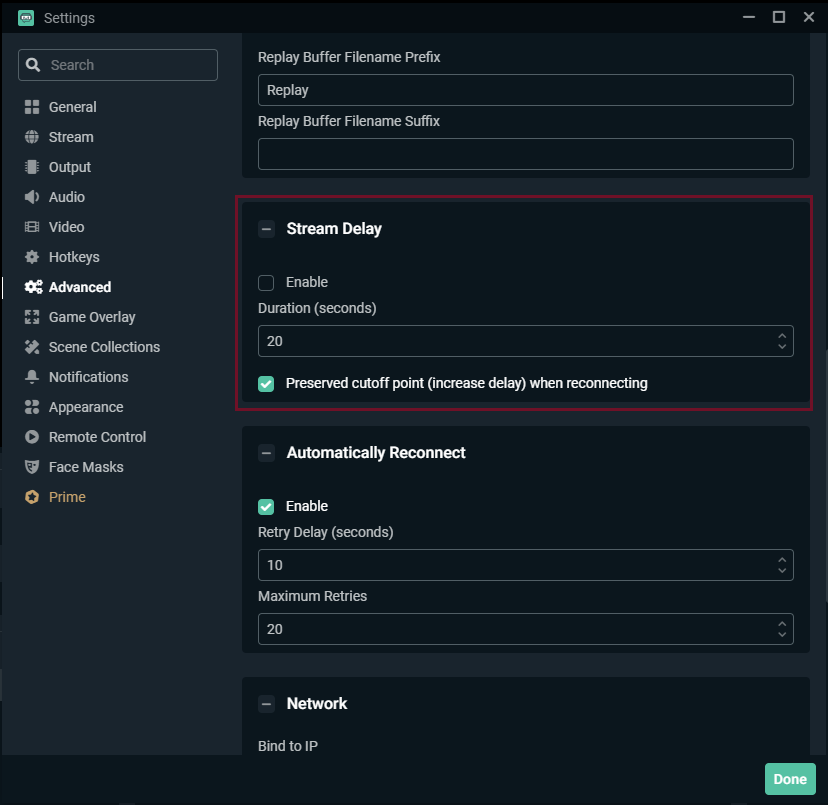
Streamlabs OBS has a similar method of enabling your stream delay. Just navigate to Streamlabs OBS Settings/Preferences page and click on the “Advanced” tab.
Scroll to the stream delay section and configure as you like. Click “Done”, then start streaming! To disable the delay, simply untick this box.
XSplit Gamecaster
If you would like to add a stream delay to your XSplit Gamecaster software, you can only do so on a premium subscription. The stream delay feature is sadly not included in the free version.
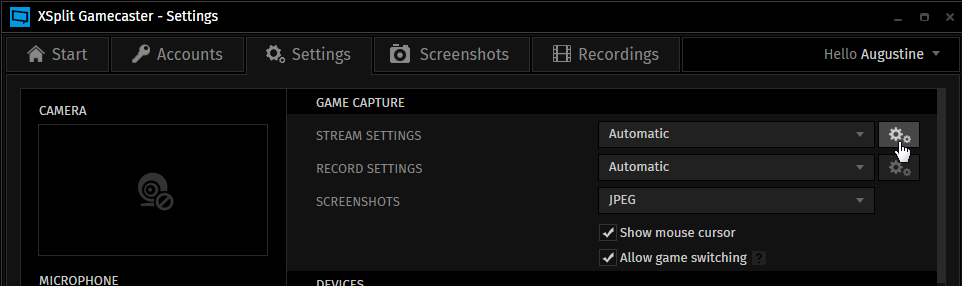
Open Xsplit Gamecaster’s settings, then click “Settings” tab. From there, click on the gear next to “Stream Settings” to open the next configuration screen.
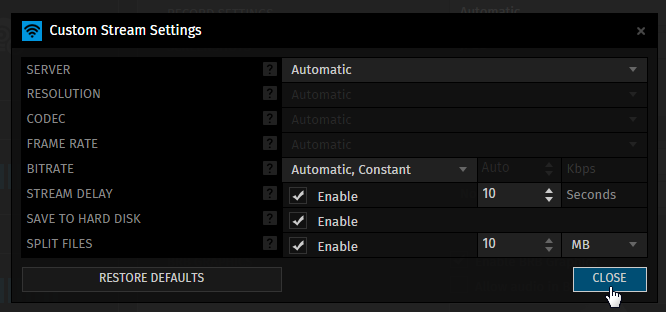
Find the stream delay row and tick the “Enable” box with the duration you want. Click “Close” and you are good to go! Disabling this is just as easy – just untick the box!
Final Thoughts
Using a stream delay can be incredibly beneficial for you if you are very competitive in games. If you are a bigger streamer with a huge audience, you will also probably want to run a small delay just to prevent stream snipers from ruining your games often.
Remember the pitfalls of longer stream delays and how they can affect interactions with your viewers, however. To help this along, always inform your viewers about your stream delay (through your stream title, your chat bot, and commands).
So what’s your reasoning for wanting to add a stream delay to your Twitch stream?
Let us know in the comments below!