Using the same PC to game and stream can be pretty taxing on your rig.
Often times resulting in you having to lower your in-game settings, sacrificing graphics quality just so you can play at a decent frame rate
Or even having to stream at a lower quality, which allows your computer to run smoother, but comes at the cost of providing your viewers with a lesser experience (video quality wise).
So if you already have a decent secondary PC, or are planning on getting a dedicated streaming PC, and don’t want to spend the extra money on a capture card, then keep reading.
In this guide I’ll be showing how you can easily stream using 2 PC’s or even a laptop without needing a capture card.
The two programs you’ll need to be using are:
- OBS Studio
- NDI Plugin (for OBS)
Both gaming and streaming computers will need each of these programs installed.
To give you a visual overview of how this 2 PC streaming setup works, here’s an image below:
Step 1. Download NDI Plugin
This dual PC streaming magic is all possible thanks to this kickass NDI plugin.
We need to install this plugin on both of our PCs, so make sure to do this step for each of your computers.
Head over to this link, then click the Download button.

You’ll get taken to a GitHub page where you can download the appropriate installer for your operating system.
I use Windows, so as of writing this guide the link I would click is the obs-ndi-4.5.3-Windows-Installer.exe
Download that, and install it on your computer. Nothing more needs to be done once you go through the installation.
Remember, make sure to install the NDI plugin on both streaming and gaming PCs.
After the plugin is installed, reboot your computers then open up OBS.
Step 2. Enable NDI Plugin (gaming PC setup)
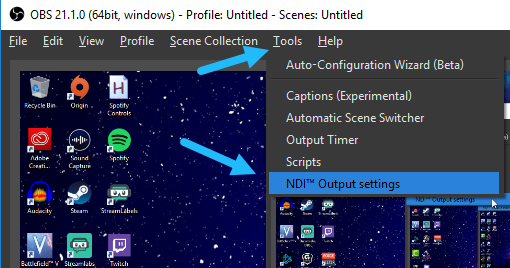
In OBS Studio on your gaming PC click on Tools, then NDI Output settings. You should see a small window pop up.
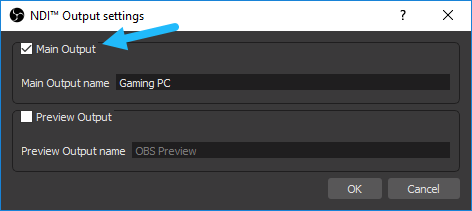
Name your Output to whatever you like (like “Gaming PC” for example). Then make sure the Main Output box is checked.
Once you’ve enabled the plugin it’s time to set it up on our streaming PC.
Step 3. Add NDI Source (streaming PC setup)
In OBS Studio on your streaming PC right click inside your Sources box to add a new source.
Look for the NDI Source option, and click that, then name the source however you like, or leave it as default

In the next window that pops up you should see a Source name option. Click on the down arrow to pull up a list of available sources. You should see the “Gaming PC” source. Select it.

For the other settings in this window I just leave everything as default and it works perfectly. So you can most likely do the same.
Click OK, and after a couple of seconds you should now see the Gaming PC output being displayed in your Streaming PCs OBS window.
You’re now able to use your streaming PCs OBS to stream anything you output from your Gaming PCs OBS!
NDI Source Not Showing Up?
If your streaming PC isn’t displaying your gaming PC’s NDI output when you set everything up correctly, then this black screen fix might help you.
For Windows:
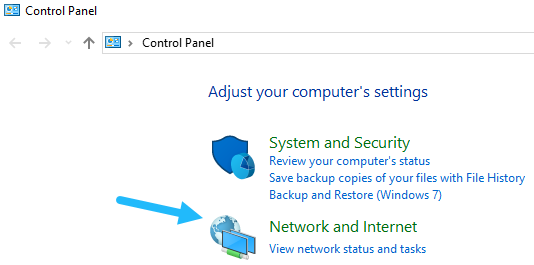
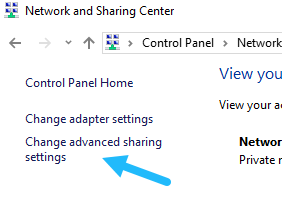
1. Go to your Windows Control Panel, and choose the Network and Internet option.
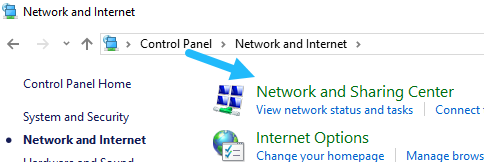
2. Click Network and Sharing Center.
3. Click Change advanced sharing settings on the left side menu.
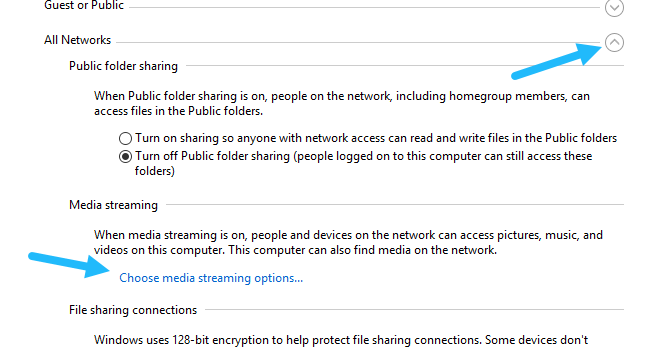
4. Click the down arrow to expand the All Networks settings, then click Choose media streaming options…
5. If you see something like the image below, then click on the Turn on media streaming.
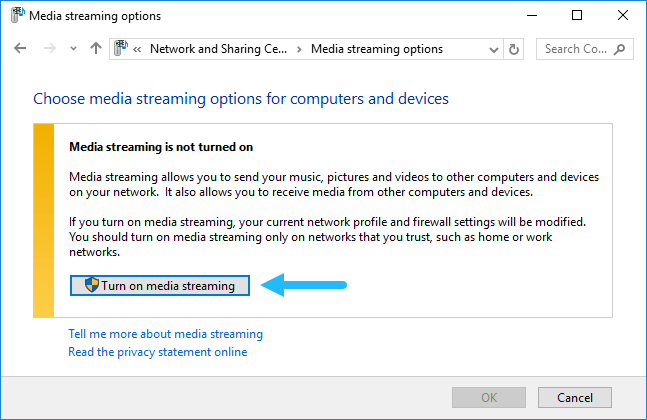
Do this for both gaming and streaming PCs, then restart both OBS Studios and try the NDI source again.
That’s what I did when the source wasn’t showing anything on my streaming laptop (just a black screen) and now it works. Hopefully that works for you too!
So that’s how to setup 2 PC’s for streaming without using a capture card.
If you have any questions just leave a comment below and I’ll see if I can help you out.
Have a good one 🙂